My Tractor Forum banner

Converting 45 Loader to JDQA - Build

21K views 35 replies 15 participants last post by  X748SE  
#1 · (Edited)
MTF user badgerland01 brought up this subject recently about anybody doing this and I’ve been mulling about doing this for quite a while so I thought I was about time I did it.

I wanted to model my JDQA after the JDQA that is used on the H120 loader on the 1023/1025.


So this is my version of what I did to make my 45 loader to have a quick attachment mechanism in order to quickly exchange the bucket to a set of forks, which BTW are yet to be built.

Since pictures seem to tell a better story this thread will be picture heavy.

------------------------------------------------------------------------

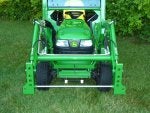
Started off by ensuring that I could get the 3/4” round bar, which JD refers to the loader “equalizer link pin” drilled out correctly for the pin fasteners.


Used a 4 ¼” grinder with a very thin cutoff blade and first remove the bottom 1” square hydraulic cylinder over extension stops.


Then used the cutoff grinder to carefully cut out the existing welds on the bucket brackets. Used a large adjustable wrench to wiggle the bracket side back and forth the snap off the rest of the weld that I couldn't get with the grinder.


Note: A 5” grinder with a thin cutoff blade would work better than the 4 ½” one I used.

Marked out the cut lines and using a hole saw, drilled the holes for the top 1 ¼” bar.


This pictures show the pieces that will be used on the loader side. In the end I didn’t use the two small rectangular supports as I felt I didn’t need them after thing were welded up.


Chamfered the holes on the back plate so that the locator pins would slide in easier.


Picture showing the bucket side attachment brackets and pins. The curved formed ones were bought from JD.


Picture showing bucket bottom plates and pins with chamfered edge.


Pin ready to be welded in. Both plate and pin have chamfered edges in order to get a deeper penetration weld.


This is the set up that I use to get everything aligned before I tacked the side plates on. I used exact width spacers between the sides to keep them properly spaced.


Used a 1 ¼” round bar to align the top “fittings” of the JDQA and then clamped an angle iron next to it in order to have a reference line.


Removed the 1 ¼” round bar and tacked in the “real” cut to length top fittings and started to weld the loader side brackets.


Installed the brackets on the loader arms and then extended the cylinders to the point just before they started to bend. Clamped, tacked and then welded on the 1” square bars to serve as over extension limiters.

THANKS bagerland01 and AndrewOliver for the info on this!


Got the bucket lined up and welded on the bucket-side brackets.


Tested it out on the dirt pile to verify if the brackets would hold up to riggers of loader work, thus things got a little dusty and dirty. So this is how my version of the JDQA looks on the loader.


Now comes some touch up and green paint.

Roger
 
#3 ·
Looks great Roger. Nice work. Thanks for sharing. :thThumbsU
 
#12 ·
Larry,

Thanks! I hope to get it painted by the end of this weekend as I need to do some loader work. It will be a good test for it.

Roger

Awesome work Roger. Looking at the setup, you had to pretty much fabricate everything except the u-shaped pin mount?
Bill,

Thanks! I fabricated everything except the bucket side "receiver" brackets which I bought from JD. The U-shaped pin brackets are made from 1 1/4" round bar which were drilled out and welded on two sides only. I then took my grinder with a thin cut off blade and carefully cut out the slot where the pin goes. It definitely took a bit of time to do this.

Roger
Very very nice, as always. :thThumbsU

Yours looks a lot prettier than mine. Did you cut out pieces with a plasma cutter? It looks like a factory made Q.A. I got mine functional, and never got around to the cleanup and paint phase. I like your upper bucket mounts better than mine. The upper mounts on my forks got bent out by the force of the curl cylinders picking up heavy loads with the tips of the forks. I like that yours have side plates to strengthen them. Are the 2 sides of the tractor side mounts hooked together by that pipe so that they both move at the same speed? We have a big Deere (5420) that they aren't, and it can be a real pain sometimes.
Andrew,

Thanks! Well to be honest it was one of your posts that you made in badgerlands01 thread about bending your upper mounts when using your forks that made me think about my original design (which was totally different then what I built) and that I needed to changed it somehow to prevent this.

In order to do this I realized that I needed some sort of reinforcement on the sides of the upper receiver bracket. What this entailed was to change the design so that the loader brackets were a little narrower so that the "stub" could fit up inside. Everything after that sort of fell into place.

I only used the plasma cutter to "rough cut" the piece out of the loader front brackets. I "straightened" the cut by clamping the two pieces together along with a piece of angle iron. I then used my grinder to grind down the edge until it reached the angle iron. The metal was cut to length using a metal chop saw and all holes where drilled on the drill press using metal hole saws.

The 3/4" bar that is between the loader bracket does keep the brackets aligned. I basically copied what JD did with their H120 loader.

Roger

Very nice!! :fing32:
Mike X485,

THANKS!

Roger

Great write up and great job Roger. Your QA looks great
Deerx585,

Thanks and the intent on the write-up was to help anyone considering doing this type of mod.

Roger

You did an excellent job on the work and the write up. We'll done as always sir.:congrats:
badgerland01,

Thanks! It gives you something to think about when you get around doing yours. There are few things that I would change and one of them is the use of pins. It was a bit late for me to change the design as I already had them (pins) made and it was a lot of work getting everything aligned. I really like the way AndrewOlivers latch works on his QA.

Roger

Nice work Roger!! This inspires me to attempt this project.... Once I have the metal working part down! :D
Kyle,

Thanks!!

What do you mean "attempt" ... As Yoda said: No, Try not, Do or do not, there is no try!

It really wasn't that hard to do. I think the hardest part for me was taking the grinder and making that first cut on the bucket brackets.

Roger


Well done, Roger! Inspiring and classic craftsmanship on display, again. Jay
Jay,

Thanks, Still learning about that craftsmanship you speak of. I sometimes feel I'm $%^& lucky to have things turn out they way they do. What people don't see is how many times I have to remake a part or fix it somehow.

Don't tell anybody but I made 2 "lefts" of the lower bracket that are on the bucket. I welded the pins in and found my mistake, drilled one of the pins out, re-welded the pin in again only to find out that I made 2 "lefts" again. Cursed a few times and called myself an idiot. At that point I called it a day....

Roger

Nice Job!
tractorPete,

THANKS!

Roger
 
#4 ·
Awesome work Roger. Looking at the setup, you had to pretty much fabricate everything except the u-shaped pin mount?
 
#5 ·
Very very nice, as always. :thThumbsU

Yours looks a lot prettier than mine. Did you cut out pieces with a plasma cutter? It looks like a factory made Q.A. I got mine functional, and never got around to the cleanup and paint phase. I like your upper bucket mounts better than mine. The upper mounts on my forks got bent out by the force of the curl cylinders picking up heavy loads with the tips of the forks. I like that yours have side plates to strengthen them. Are the 2 sides of the tractor side mounts hooked together by that pipe so that they both move at the same speed? We have a big Deere (5420) that they aren't, and it can be a real pain sometimes.
 
#9 ·
Nice work Roger!! This inspires me to attempt this project.... Once I have the metal working part down! :D
 
#10 ·
Well done, Roger! Inspiring and classic craftsmanship on display, again. Jay
 
#21 ·
badgerland01,

Thanks!, The holes in the loader side are mostly for aesthetics and weight reduction but as a side note, I was able to get at the lower grease fittings through the holes quite easily.

Roger

Another fine job Roger.
Larry,

Thanks! Now for a quick attach set of forks. Are yours 42" long?

Roger

Great job Roger! On both the QA and the write up! It would have been nice to have this when I was building all my stuff, mine is definitely heavier than the the one you built weight wise . Yours turned out really nice, maybe someday I'll rebuild mine but it will be a while
Deerx585,

Thanks!

I've seen yours in badgerlands01 thread. Pretty hefty and they definitely will not bend. I hope that I will not have any issues that way as I tried to keep them a light as possible.

Roger

Roger,
Superb work. I know what you mean about making the first cut...

Now, take that 4-1/2" angle grinder & thin-kerf cutoff blade to those goal posts. :)

Andreas
Andreas,

Thanks!!

Quite a while ago I thought about cutting those goal posts off as I have my cab on all time but in the end I decided against it.

My reasoning was that if I got a bigger piece of property (like MrBeef recently done) and it required a larger tractor/loader/backhoe I would be able keep the X748 for lawn duties and it would be easier to sell the 45 loader in the end. That may never happen but who knows .....

Roger
 
#18 ·
Another fine job Roger.
 
#26 ·
Austen,

Thanks! Now to get it dirty. I need to spread some mulch in the next week or two.

Roger

That turned out perfect. I am going to try and replicate that as best I can.
badgerland01,

Thanks! I'll send you a PM later today.

Roger

Sorry, just saw this Roger. Yes they are 42" long. They weigh 85 lbs for the pair of them.
Larry,

Thanks for the info!

Roger
 
#27 ·
Very nice and easy on / off. Are you going to be making other FEL attachments for this?
 
#29 ·
Nice video Roger. A setup like that sure would make it easier on this old man! :fing32:
 
#30 ·
Sent you a PM Roger
 
#34 ·
I know this is a 2 yr old thread but , even better for a review . Would u do anything different ,it looks great , would a guide bracket be useful for stabbing and centering the bucket. If u were paying for labour would jd brackets be looking more affordable
Ljk,

Thanks for your comment. Well in the two years since I made the conversion I am still very pleased with the way that I adapted it. Since then I've made a set of forks and a grapple to fit the JDQA. Everything is still very snug and the bucket doesn't wobble one bit on the JDQA bracket.

As you stated centering the bucket to get the JDQA lined up is a bit tricky but not terribly so (not much side to side room for alignment) and maybe a slight design change would help with that. With that being said, one of my design goals was to try to keep everything a light as possible yet strong enough to handle the tasks at hand, so adding extra things to help it easily align would most likely added weight and the thus affecting the lifting capacity of loaders payload.

The only real thing that nags at me of the design is in the area of where the cinch pins are. There is not very much room beside the JDQA loader brackets to get them easily in. The ring of cinch pin is quite tight to the side of the bracket. If I would do it again, I would probably have the alignment holes in the JDQA brackets on the loader set about 3/8" further way from the sides of the bracket. Then the cinch ping could easily be installed.

As for using the newer JD brackets all I can say is that it can be done BUT there is still some custom fabrication that will need to be done with regards to the hinge pins. Those brackets are not really cheap and that is one of the big reasons I went with altering the brackets that came with the bucket. If I had to pay for labour I think it would be be a toss up as to which would be more affordable.

Your best bet is touch base with MTF users badgerland01 and his conversion, which can be found here: --> Re: Converting 45 loader to JDQA......anyone done it? and MTF user tractorPete and his conversion, which can be found here :--> CTC Loader JDQA Conversion.

Both of these gentlemen adapted the older style of JDQA brackets to be used on their respective loaders. They should be able to give you a cost estimate of adapting the JDQA brackets to fit their loaders and the amount of time and effort to do so.

Roger
 
#35 ·
So been a few weeks since we talked . I have been researching qa options and systems etc, and digesting all of it the best and cost effective way of doing it is what u did , and for all the reasons u stated. One of the reasons i wanted a qa was to see if i could adapt the blower /blade /forks ,tooth buckets /grader or box blade . After reading about a blower on fel and the issues with that. The advantage of a qa may not be for everybody, a bolt on tooth bar solves one ,clamp on forks solves #2 box blade 3 point or hitch solves #3 everything is a cost vs advantage , by the way found some of your other projects u have a natural talent for this stuff . Thanks for your guidance it is a lot cheaper to get help than to pay for my mistakes