

Quick attach loader
Hey guys, sharing my homemade front scoop that I am building to fit on my ‘79 John Deere 210. *
I've always wanted a small loader/scoop, and getting the 210 last year, I thought I would give it a try.
With a smaller yard, the scoop is intended mostly for mulch, compost, moving brush, and maybe throwing a few bags of rock in- basically a very cool wheelbarrow.
A few items were musts:
1) Easy on/off. *The loader needs to be easy to get on and off since I will not be using it every day, and I don't want to spend forever hooking it up when I need it.
2) Winch powered. The 210 doesn't have hydraulics, and I didn't feel like spending $400 on a 40 year old hydraulic system that I would then have to further modify. *Winches will suit me fine for my needs and the limited lift capacity. And they will never leak. *If a winch goes bad, the market is flooded with tons more.
3) I wanted more lift than a Johnny Bucket, but don't need to load a truck. *The extra lift is mostly to get over obstacles in my garden when moving compost, and to put yard scraps into the compost bins.
4) Powered lift and powered tilt. *I did not want the pull-string dump as I would like to be able to control laying down material, such as mulch. *I also want to be able to back drag, so it is necessary to hold the bucket in the dumped position.
5) Capacity of about 250 lbs. The 210 should already have 1 inch spindles, and I wanted a bucket about the same width as the front tires. *More on theoretical capacity later.
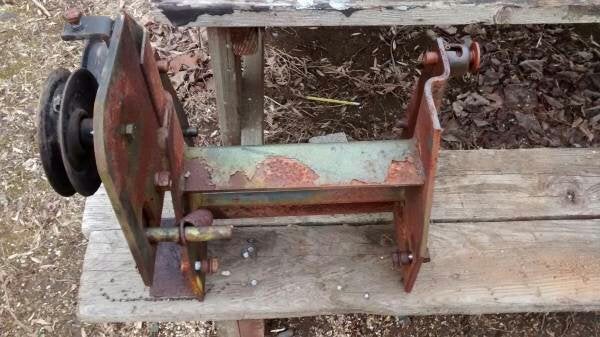
I got really lucky when I found a guy selling the mount from a 200 series snowblower locally. *The mount is ¼ plate and will provide plenty of strength. Best of all, it mounts right up to the tractor by sliding the bottom holding pins, and locking with two beefy spring pins. *Price: $40.
![Image]()
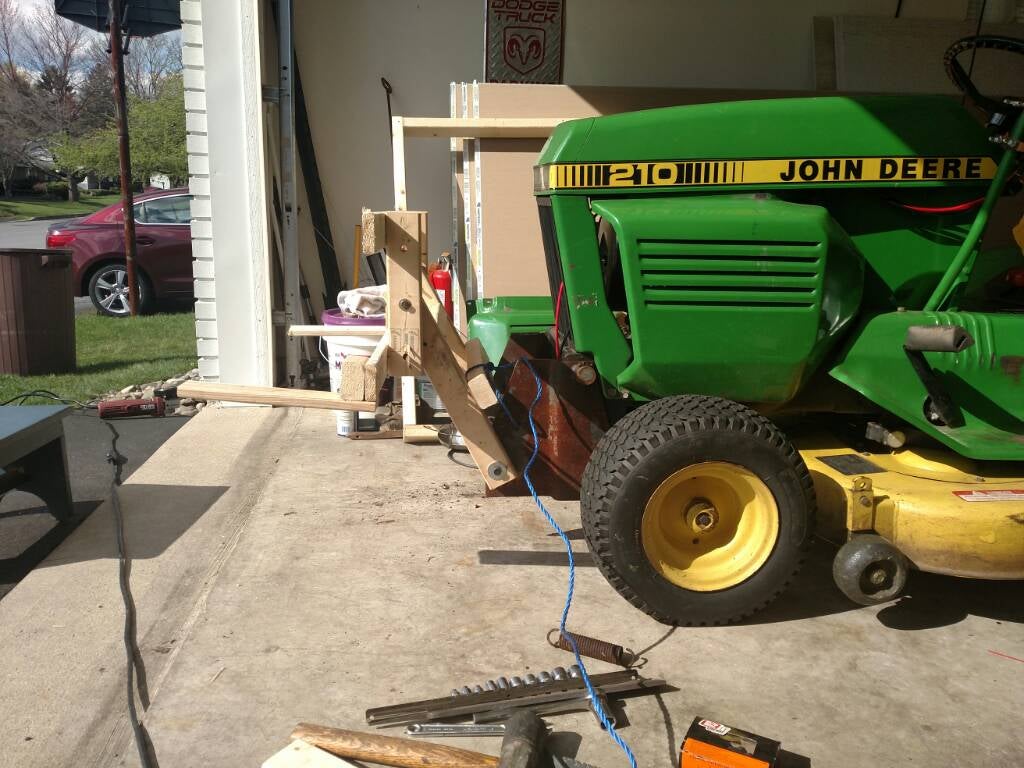
I began by mocking the rough design in wood, and quickly learned that a simple straight arm loader would not dump far enough, so I had to make mitered arms.
![Image]()
![Image]()
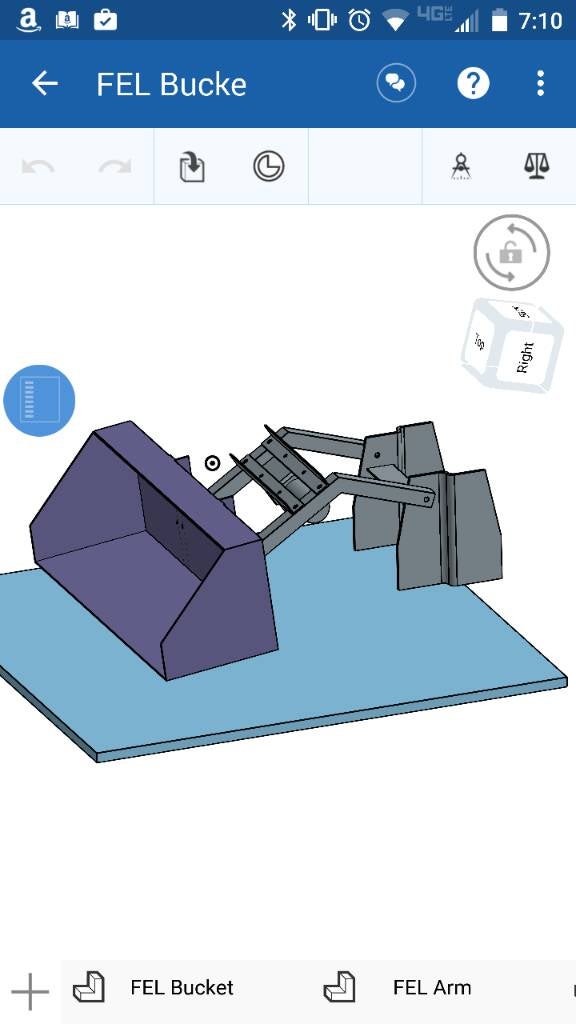
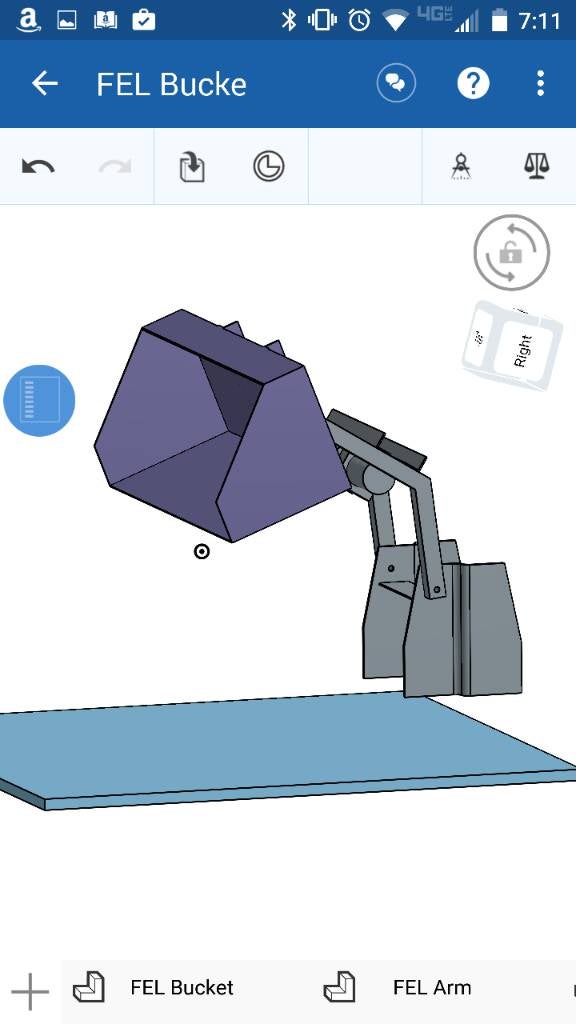
Not wanting to redo all of my right woodwork, I made a 3D CAD model which allowed me to pick the right length and angle to get a 3' lift (2' clearance when dumped), while keeping the bucket pivot 18" from the front of the tractor.
![Image]()
![Image]()
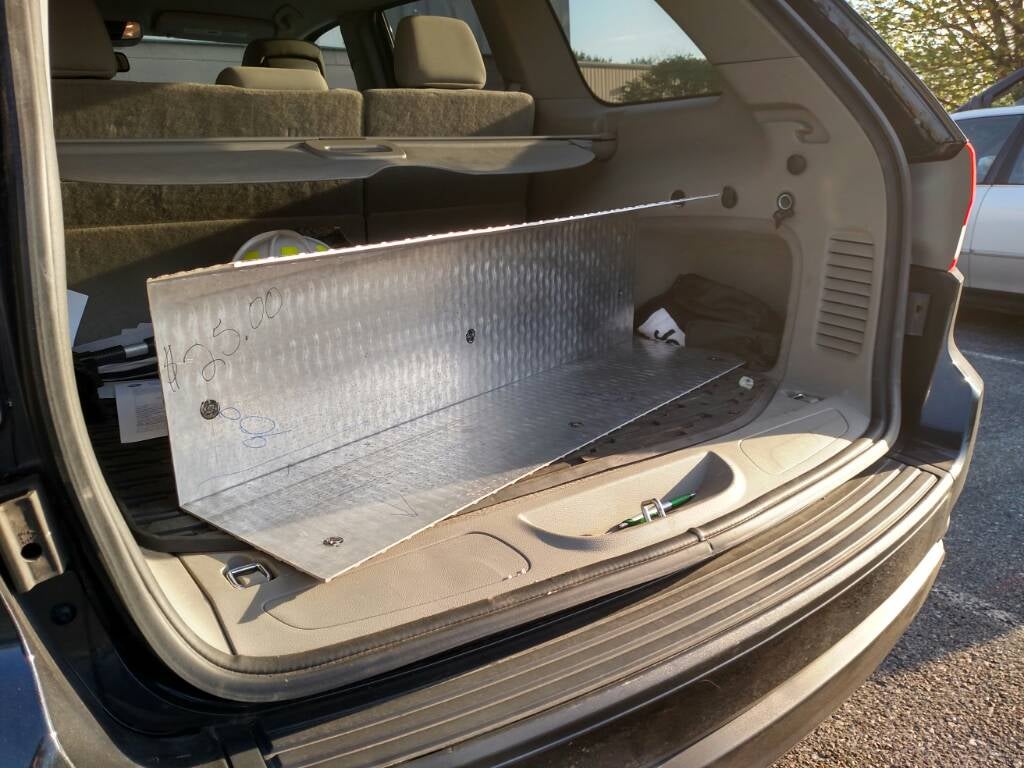
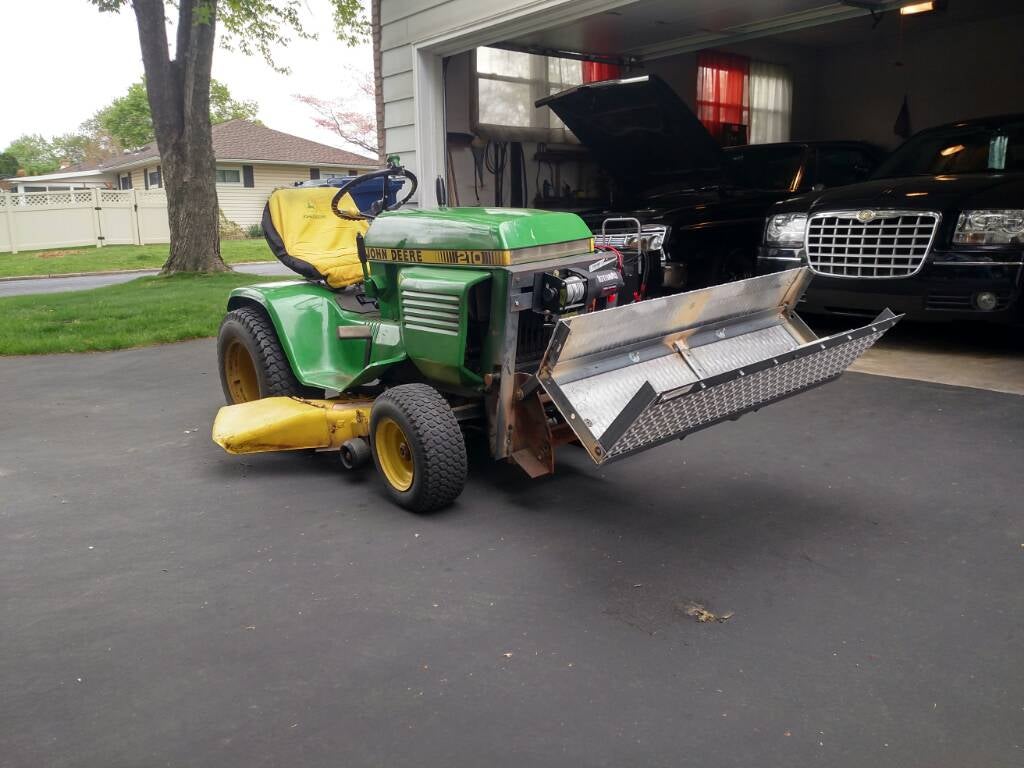
For the bucket size, I was able to scrounge a piece of 1/8" aluminum diamond plate, free plus $25 to have the bend put in it. The dimensions worked out to 10" x 10" x 39", the perfect length to come just outside the wheels. This also fits into my capacity goal (approx 2.25 cubit feet of material, assuming 100 lb/cubit ft of dirt gives a 225 lb bucket capacity).
![Image]()
After a load of steel, I got to building:
![Image]()
![Image]()
Adding uprights to support the lift winch:
![Image]()
I used another winch with cable wrapped in opposite directions to push-pull the bucket tilt, fulfilling my powered curl goal.
https://vimeo.com/165065714
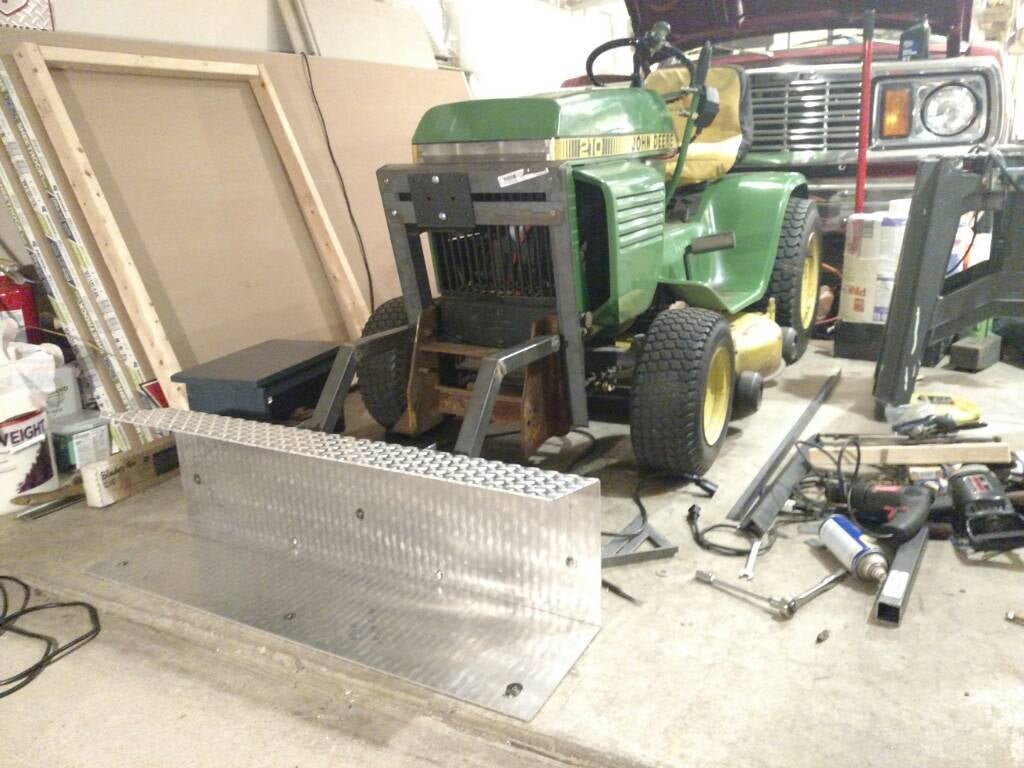
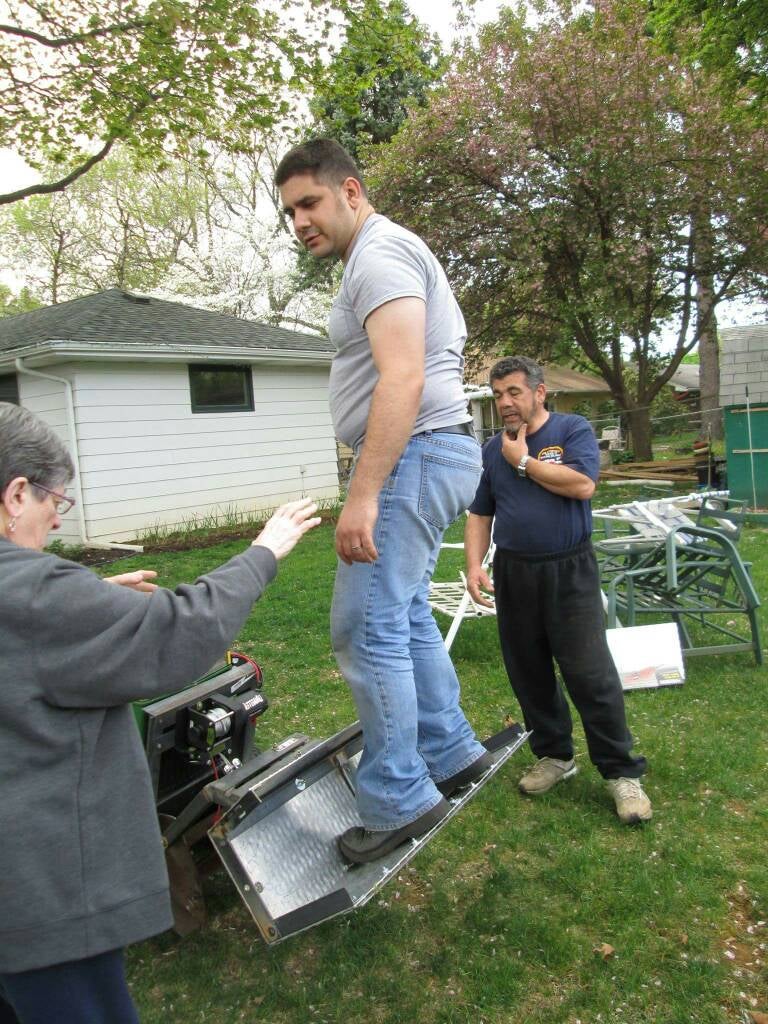
And finally, I reinforced the crap out of the aluminum bucket with 1/8" x 1.5" x 1.5" angle. I am able to step in the center of the bucket with little to no bend (and let's just say that I am pretty close to the designed capacity...).
![Image]()
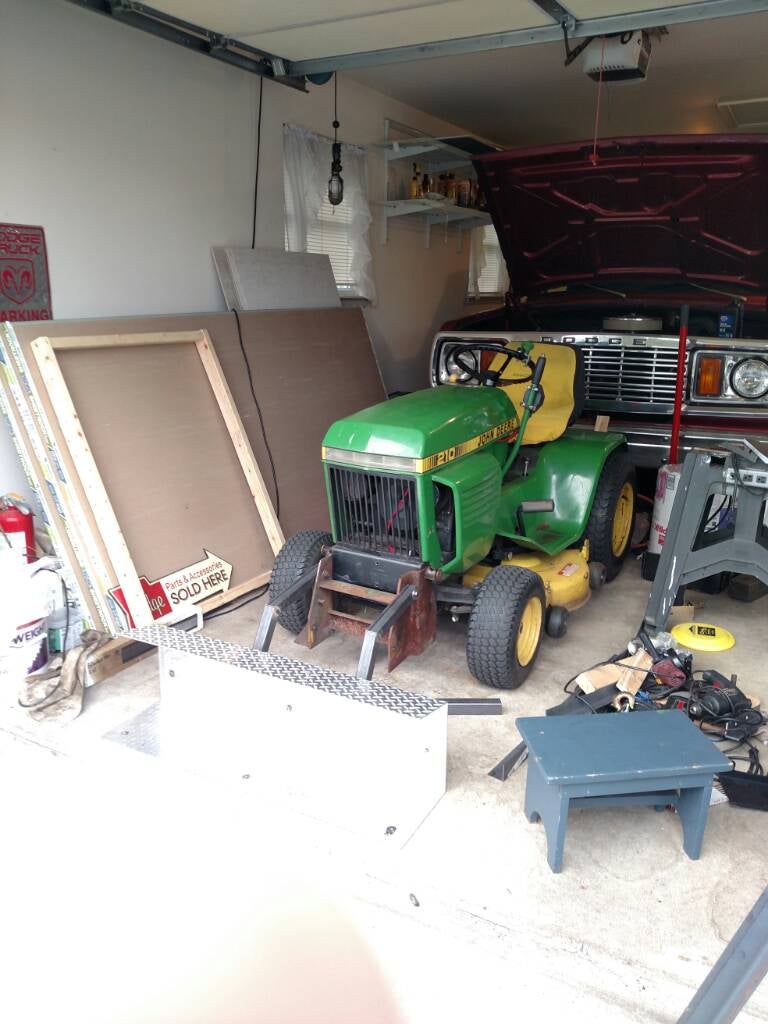
So there it is, about 5 nights of work into it so far.
![Image]()
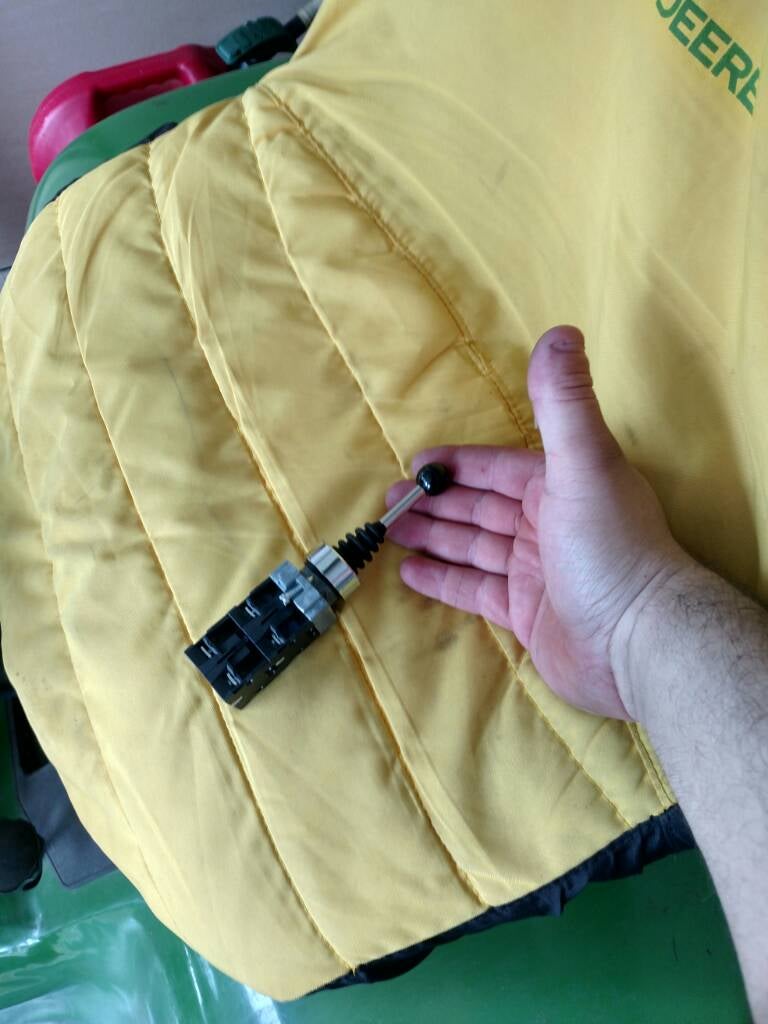
I still have to add sides to the bucket, paint, and wire up relays to this nifty joystick from Amazon.
I will add quick connects for each winch so that, come winter, I can put the snow plow (winch lifted) or snowblower (soon to be electrically lifted, and hoping for electric chute control) and just use the same electrical ports and joystick to control all implements.
![Image]()
Sent from my XT1254 using Tapatalk
Hey guys, sharing my homemade front scoop that I am building to fit on my ‘79 John Deere 210. *
I've always wanted a small loader/scoop, and getting the 210 last year, I thought I would give it a try.
With a smaller yard, the scoop is intended mostly for mulch, compost, moving brush, and maybe throwing a few bags of rock in- basically a very cool wheelbarrow.
A few items were musts:
1) Easy on/off. *The loader needs to be easy to get on and off since I will not be using it every day, and I don't want to spend forever hooking it up when I need it.
2) Winch powered. The 210 doesn't have hydraulics, and I didn't feel like spending $400 on a 40 year old hydraulic system that I would then have to further modify. *Winches will suit me fine for my needs and the limited lift capacity. And they will never leak. *If a winch goes bad, the market is flooded with tons more.
3) I wanted more lift than a Johnny Bucket, but don't need to load a truck. *The extra lift is mostly to get over obstacles in my garden when moving compost, and to put yard scraps into the compost bins.
4) Powered lift and powered tilt. *I did not want the pull-string dump as I would like to be able to control laying down material, such as mulch. *I also want to be able to back drag, so it is necessary to hold the bucket in the dumped position.
5) Capacity of about 250 lbs. The 210 should already have 1 inch spindles, and I wanted a bucket about the same width as the front tires. *More on theoretical capacity later.
I got really lucky when I found a guy selling the mount from a 200 series snowblower locally. *The mount is ¼ plate and will provide plenty of strength. Best of all, it mounts right up to the tractor by sliding the bottom holding pins, and locking with two beefy spring pins. *Price: $40.
I began by mocking the rough design in wood, and quickly learned that a simple straight arm loader would not dump far enough, so I had to make mitered arms.

Not wanting to redo all of my right woodwork, I made a 3D CAD model which allowed me to pick the right length and angle to get a 3' lift (2' clearance when dumped), while keeping the bucket pivot 18" from the front of the tractor.
For the bucket size, I was able to scrounge a piece of 1/8" aluminum diamond plate, free plus $25 to have the bend put in it. The dimensions worked out to 10" x 10" x 39", the perfect length to come just outside the wheels. This also fits into my capacity goal (approx 2.25 cubit feet of material, assuming 100 lb/cubit ft of dirt gives a 225 lb bucket capacity).
After a load of steel, I got to building:
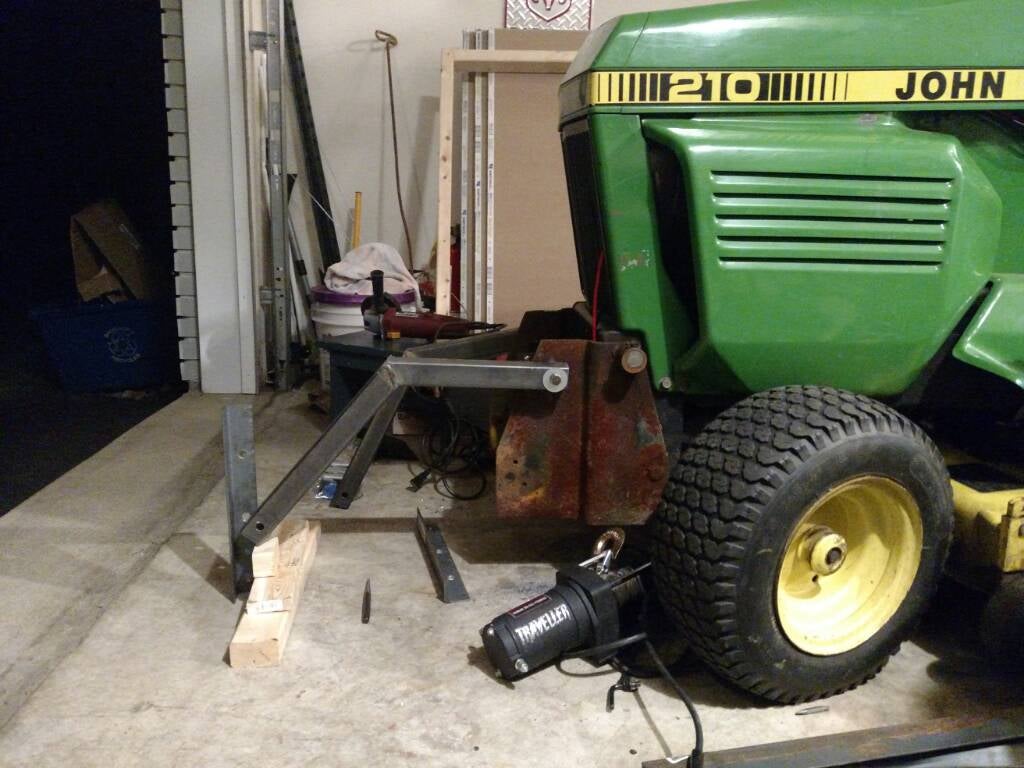
Adding uprights to support the lift winch:
I used another winch with cable wrapped in opposite directions to push-pull the bucket tilt, fulfilling my powered curl goal.
https://vimeo.com/165065714
And finally, I reinforced the crap out of the aluminum bucket with 1/8" x 1.5" x 1.5" angle. I am able to step in the center of the bucket with little to no bend (and let's just say that I am pretty close to the designed capacity...).
So there it is, about 5 nights of work into it so far.
I still have to add sides to the bucket, paint, and wire up relays to this nifty joystick from Amazon.
I will add quick connects for each winch so that, come winter, I can put the snow plow (winch lifted) or snowblower (soon to be electrically lifted, and hoping for electric chute control) and just use the same electrical ports and joystick to control all implements.
Sent from my XT1254 using Tapatalk


